How-To: Remove Rear Deck & Third Brake Light
How to remove the rear deck in order to get the third brake light out of the way for window tinting purposes.
As we've figured out by now, the third brake light is not exactly the easiest thing to work around for window tinting purposes. Removing it is not as simple as one would like, due to the design where the pedestal assembly is molded/glued into the rear deck itself. The rear deck is nothing more that hard-molded felt material, which although lightweight, would make it really easy to bend/crease/ruin if removed improperly. Here is how to get it out without damage:
Here are the tools you'll need:
small flat-tip screwdriver (mainly for the pop-out black clips, but also for prying behind panels to gain a finger hold),
10mm socket (preferably deep well, or maybe on a screwdriver handle),
Interior panel clip remover
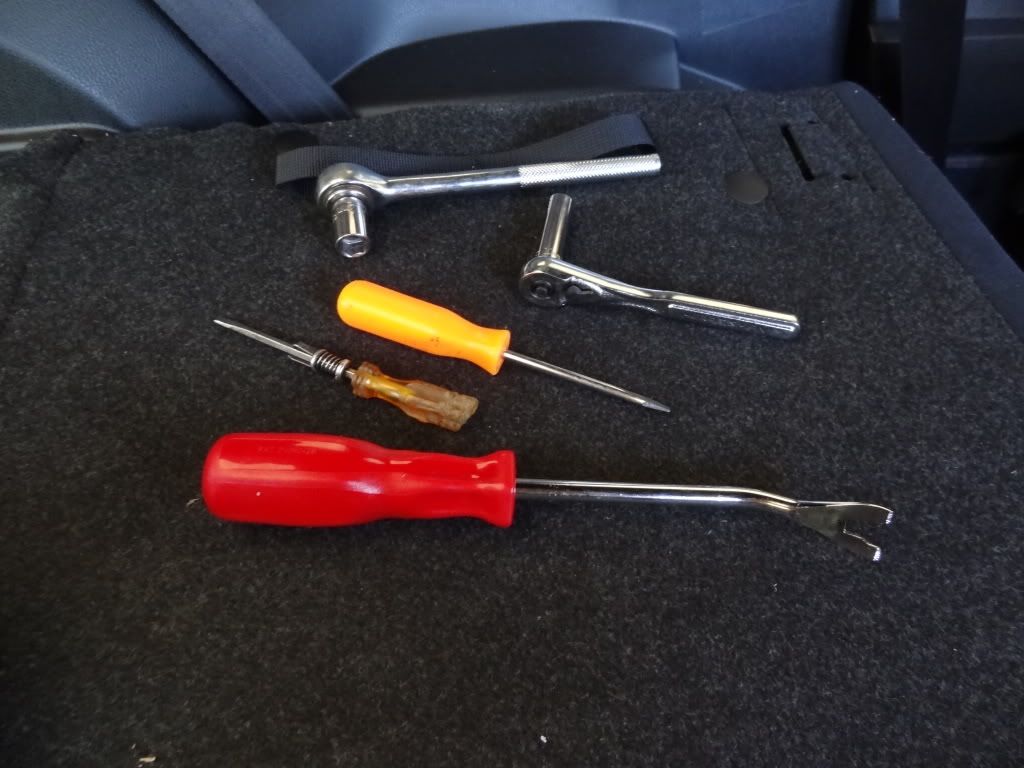
If you plan to remove the seat back as well, a 12mm socket is required for the bolts attaching it to the hinges. I didn't need it this time, but my first attempt at this required the removal of the seat back. I'll explain later.
Before you get started, you should unhook your battery. You will be working around the C-Pillar air bag unit, so, you know, safety first and whatnot.
1) Loosen the panel over the C-Pillar which houses the air bag.
This is the point of attack:
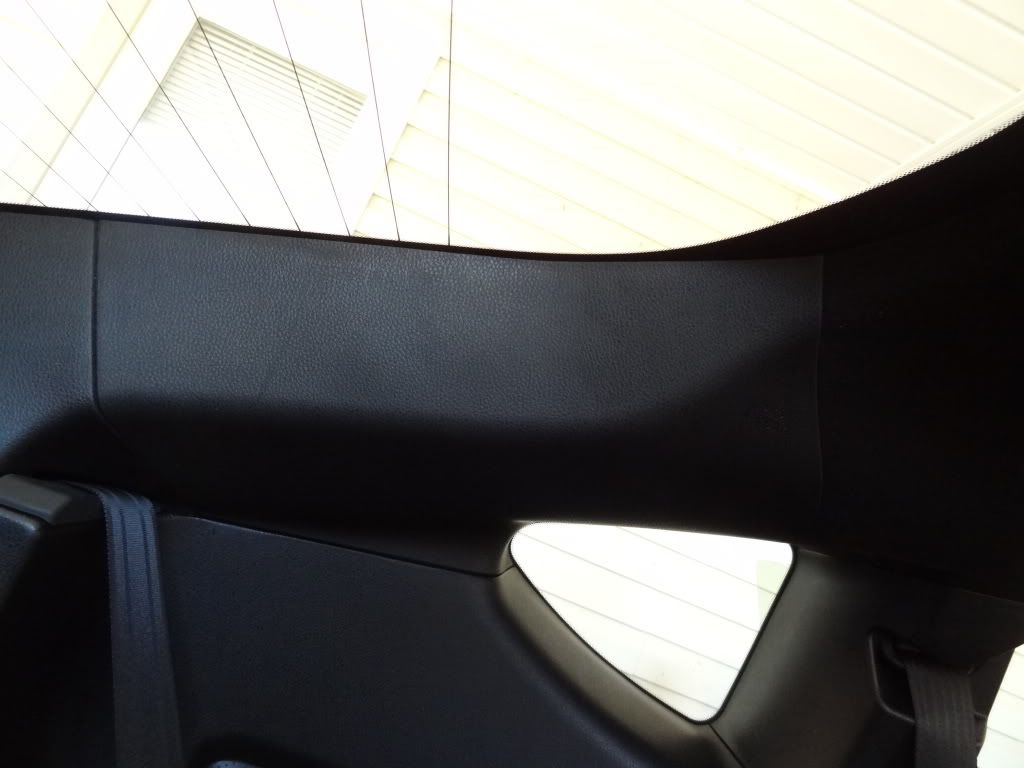
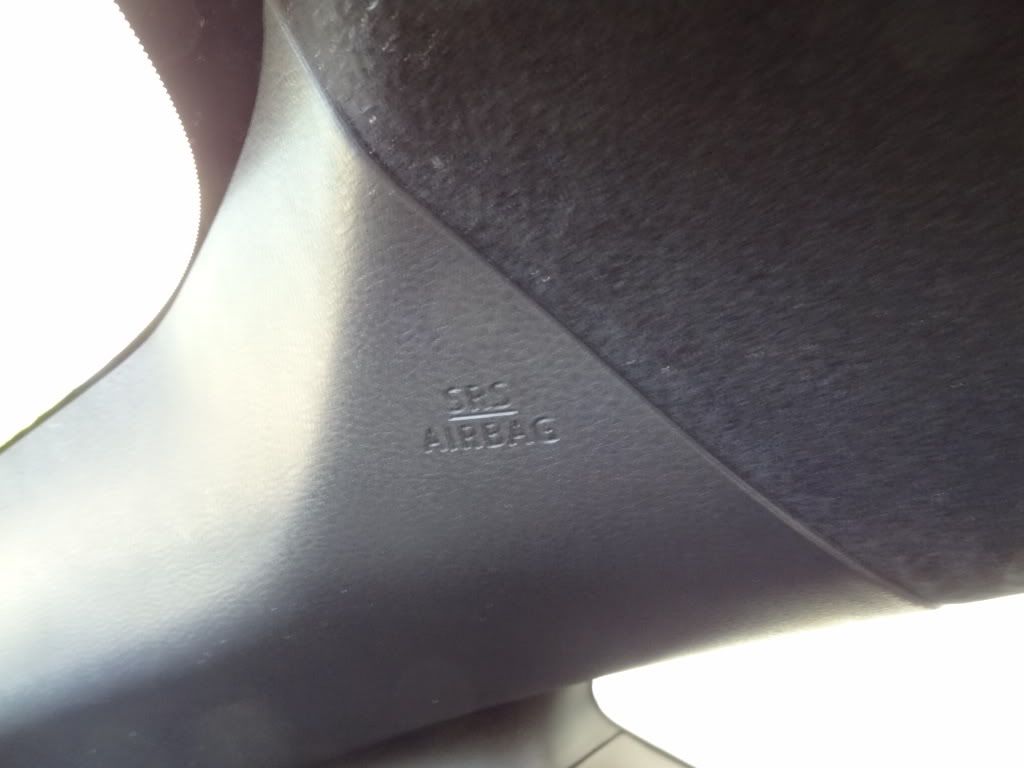
Take a small flat-tipped screw driver (or other prying tool) and gain a finger hold on the panel.
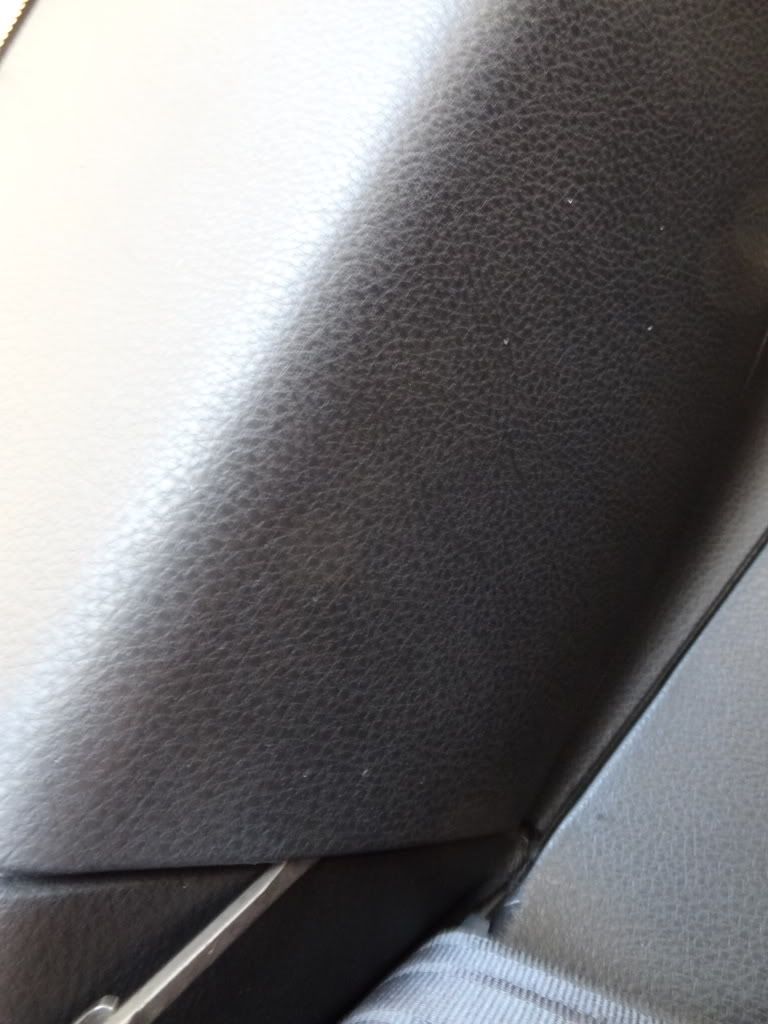
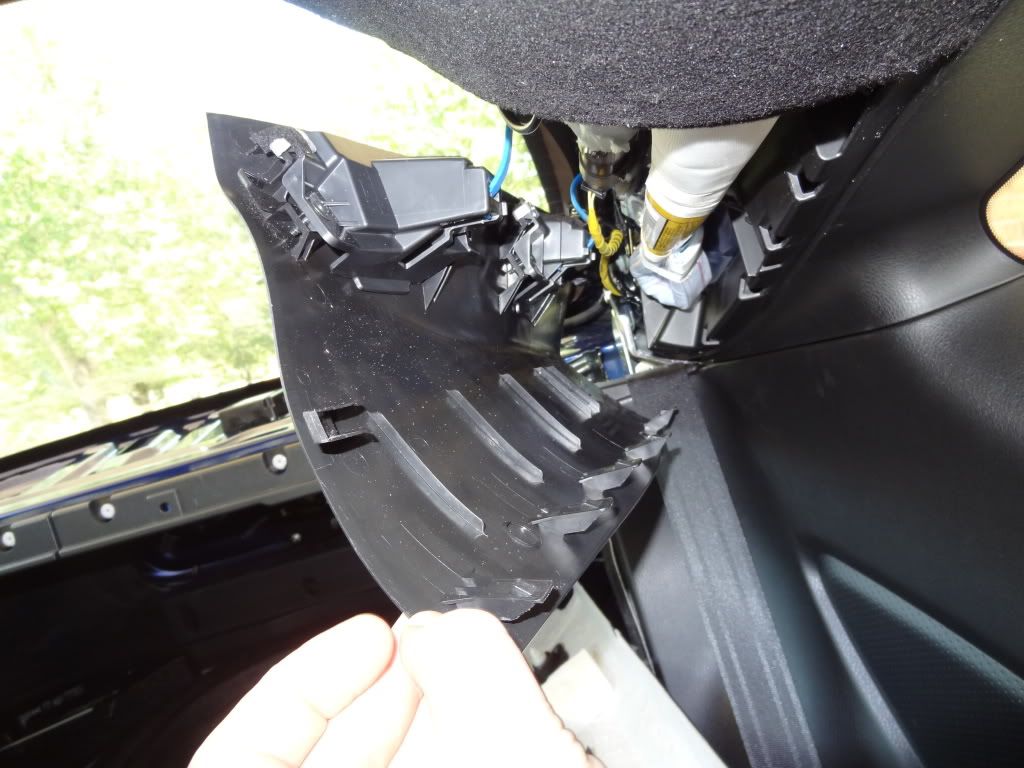
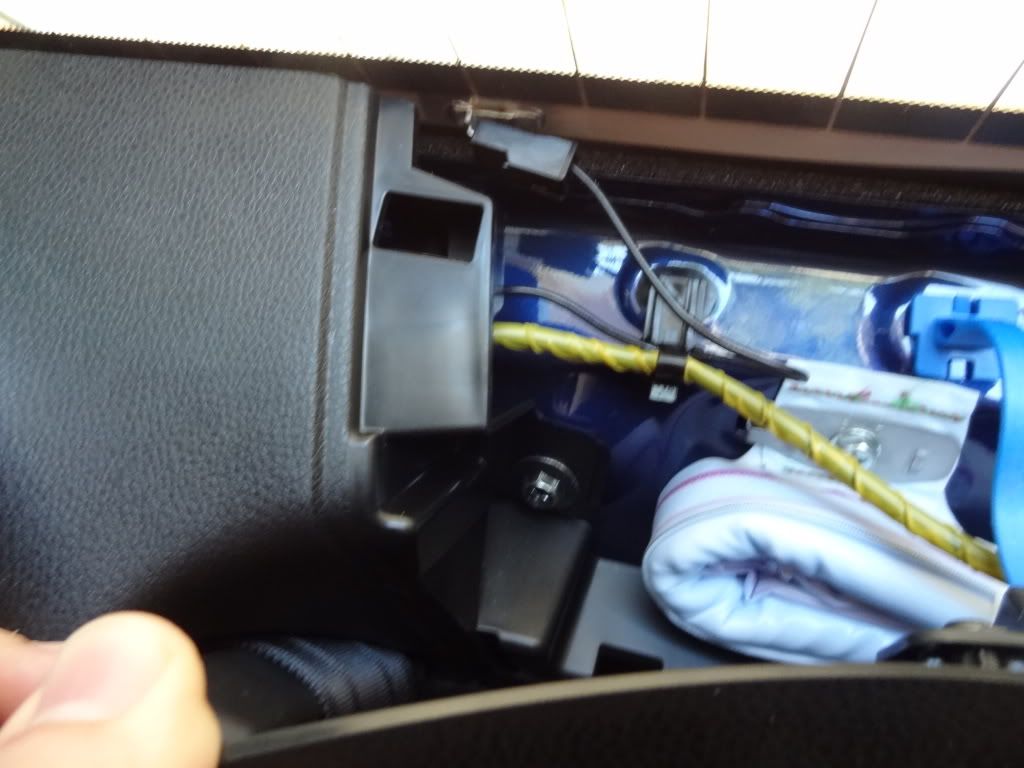
As you can see, there are five (5) clips along the bottom edge, and one (1) on the top at the rear. Also there are the two (2) blue straps that keep the panel attached in case of an airbag deployment.
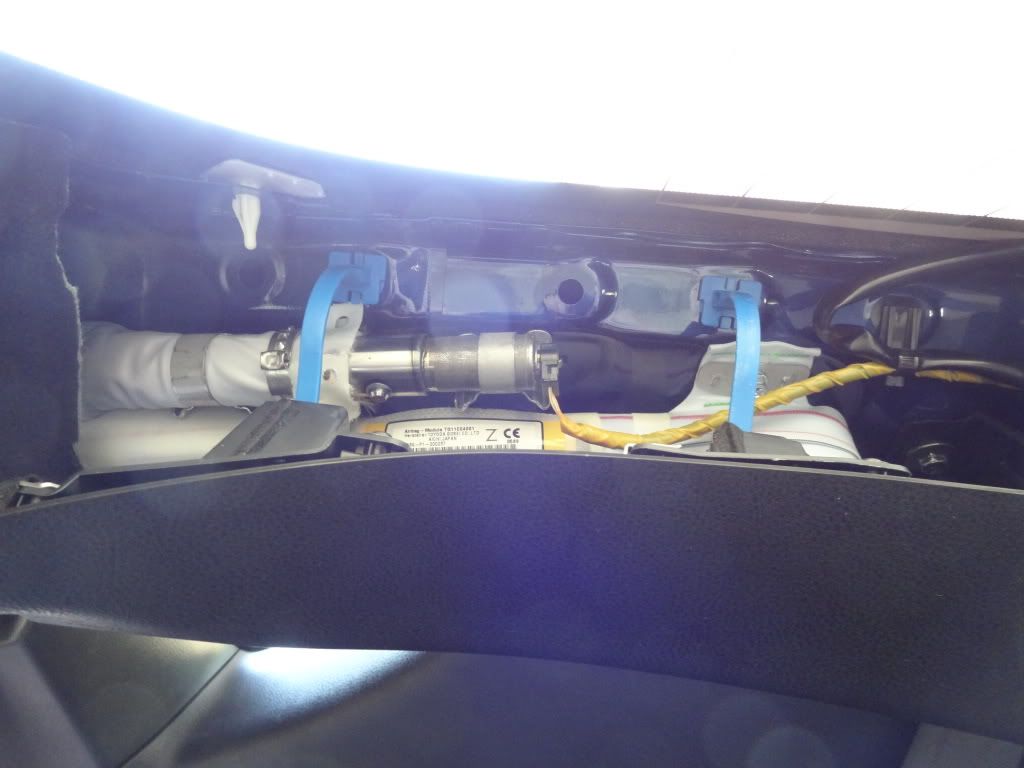
These should not be removed, and unfortunately therefore the panel will be hanging there in the way once you have it loosened up. As you can also see there are two prongs that stick out of the front edge of the panel, which clip under the ceiling fabric panel.
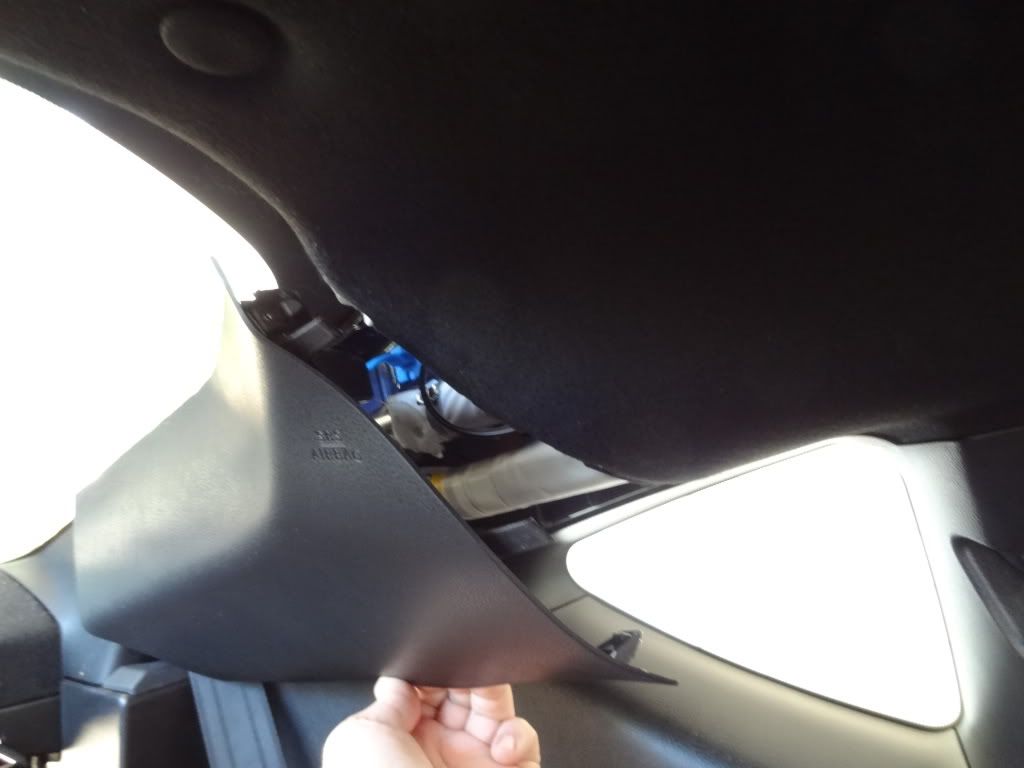
Once you have the top and bottom edges unclipped (by just pulling out towards you by hand) take extra care to wiggle those prongs out as you slowly pull the panel towards the rear of the car. Once it's loose, pull out and down on the blue straps to let the panel hang as loose as possible. You should see this:
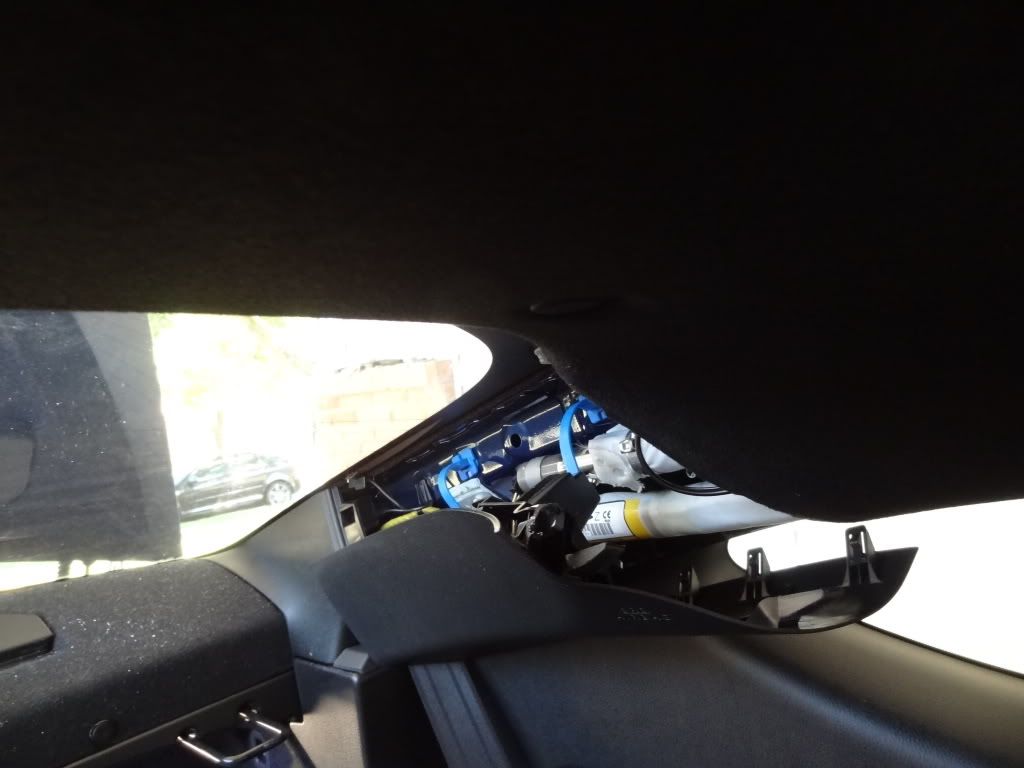
2) Remove the smaller, triangle-shaped panel at the bottom of the C-Pillar.
Use the 10mm socket/ratchet to remove the screw attaching the panel to the frame. This screw is VERY TIGHT from the factory, just so you know. I thought I broke something or stripped the head the first time I loosened it.
(Sorry I didn't get a pic of the socket on the screw...only got two hands.)
Next you'll need to remove the two clips holding the trunk liner to the interior panel.
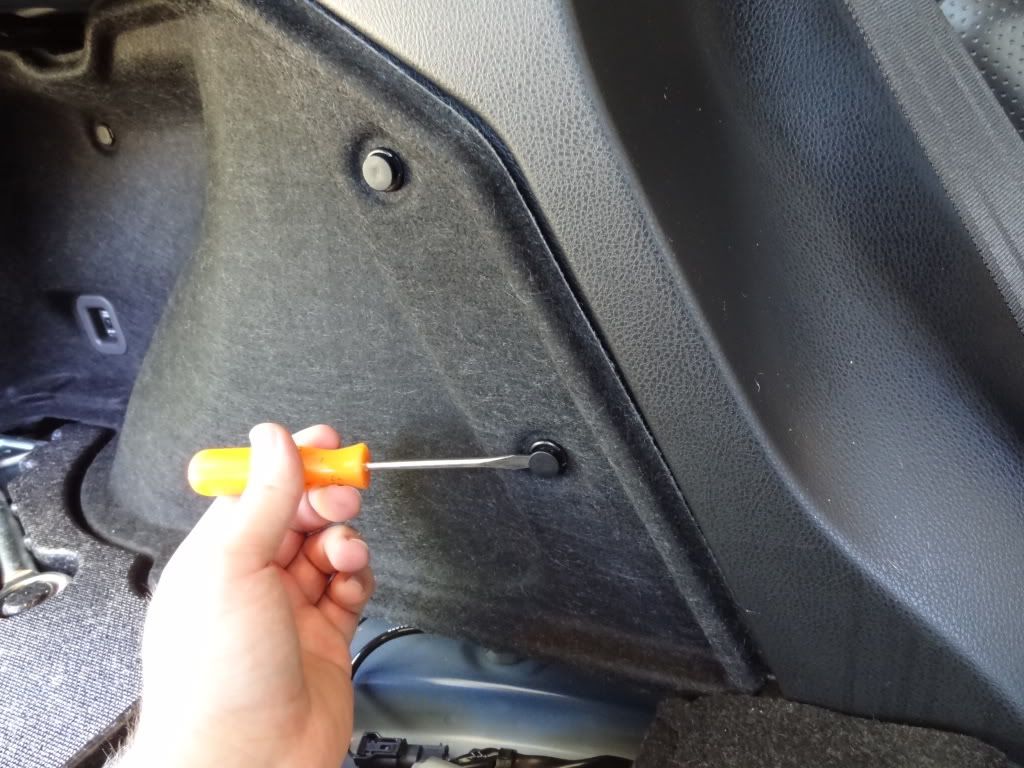
Removing the trunk floor panel and carpet helps, so you don't have to fight with it when maneuvering the felt panel out of the way, like so:
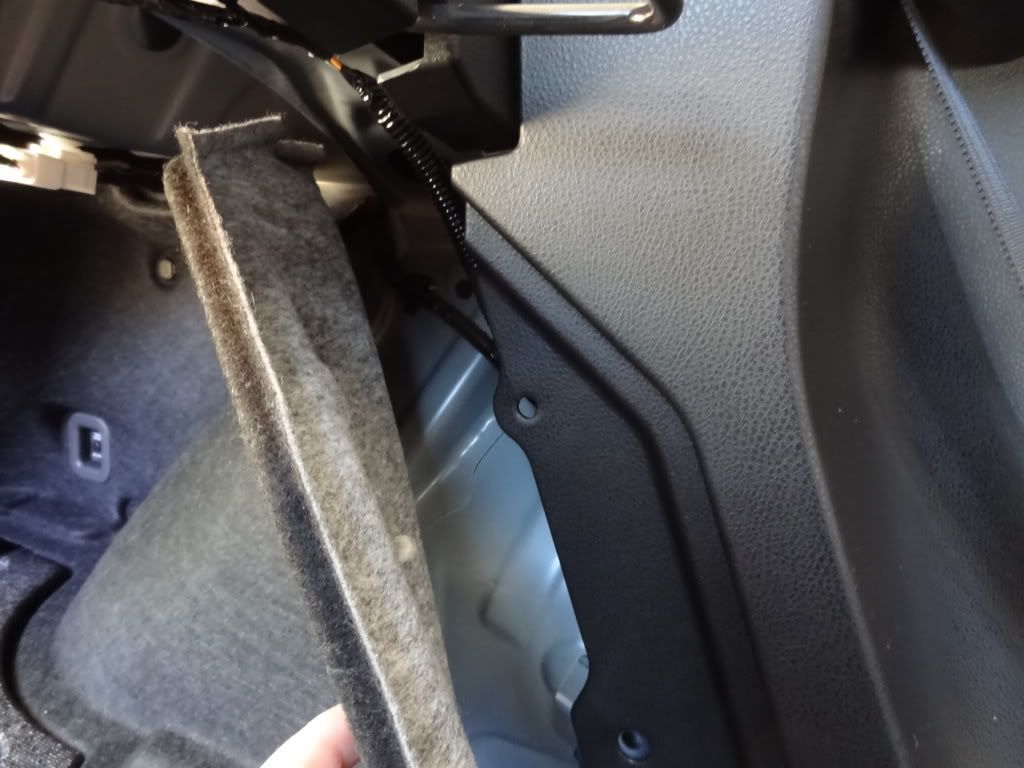
THIS IS WHERE THINGS CAN GET A LITTLE TRICKY!!!
After you remove the clips, you want to pull the interior side panel loose at the top, where the seat belt comes out, because it actually clips in to the panel we are trying to remove. BE VERY GENTLE WITH THIS, and I recommend holding pressure in this area here:
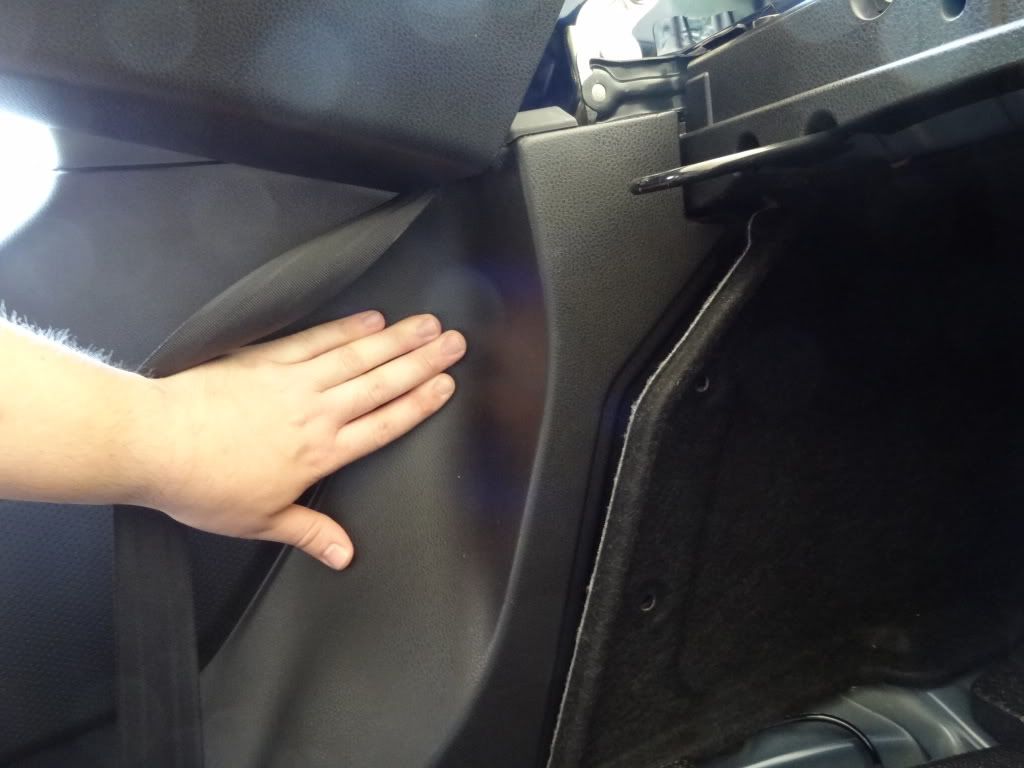
in order to keep the panel from pulling its clips out of the car frame. The clip in this area in particular is not held to the panel itself very strongly, and trying to get it lined back up with the hole in the frame can prove to be a nightmare. I learned the hard way, and whilst trying to line it up with the hole the first time I did this, I ended up knocking the clip out of the panel, and the clip found its way down below the interior sheet metal and into the frame rail of the vehicle. I pulled the panel, seats, and seat back out and couldn't find it. I thought it was lost forever but miraculously after a day of driving, it managed to rattle its way into a place I could reach, and I stuck my arm down inside and was able to fish it out.
Next take your panel clip remover and pop out the clip here:
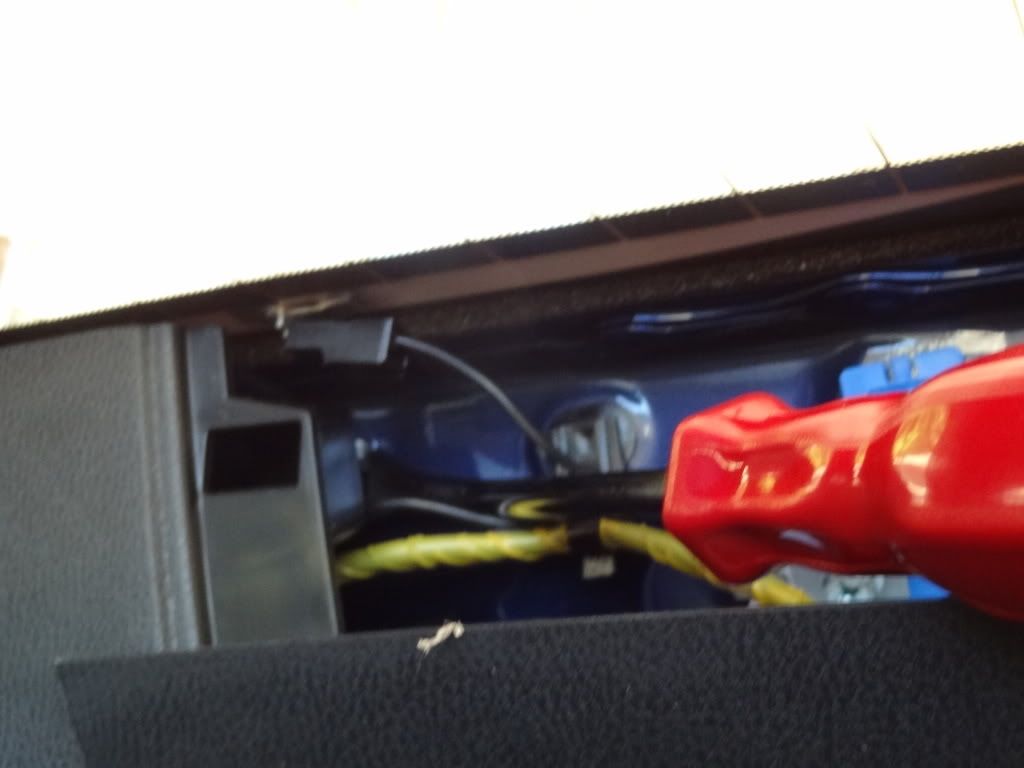
and then pull straight out at the bottom of the panel to pop out the other clip. With a little twisting and pulling, the panel can now be removed. Here is the back so you know where the clips are I'm talking about:
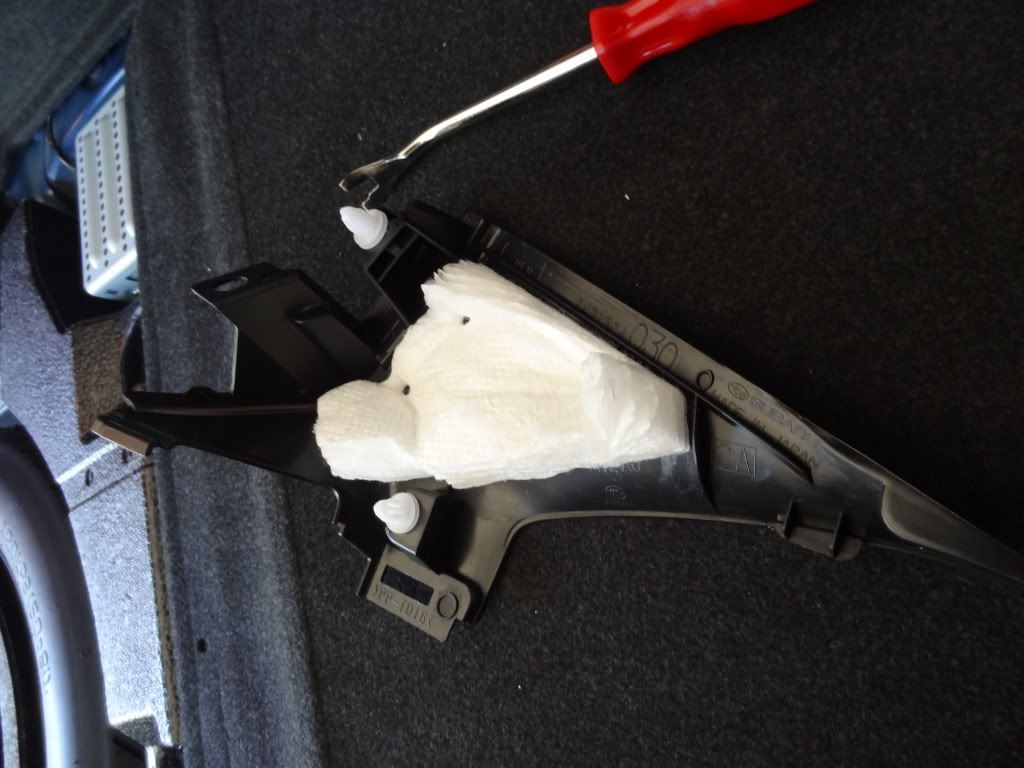
Now, repeat steps 1 and 2 for the opposite side before continuing.
3) Removing the deck
Now that both sides are loose, all you have left to do is remove the rear deck panel itself. First, remove the black clips from the front of the panel here:
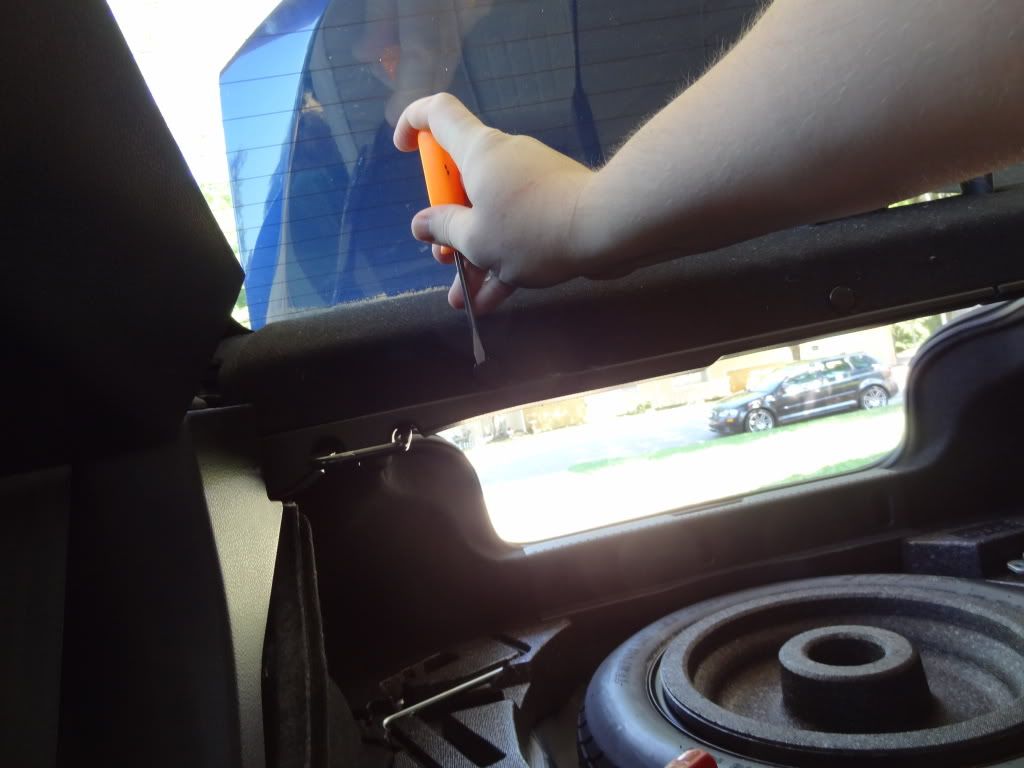
Next, take note of the positions of the white clips on the deck panel itself:
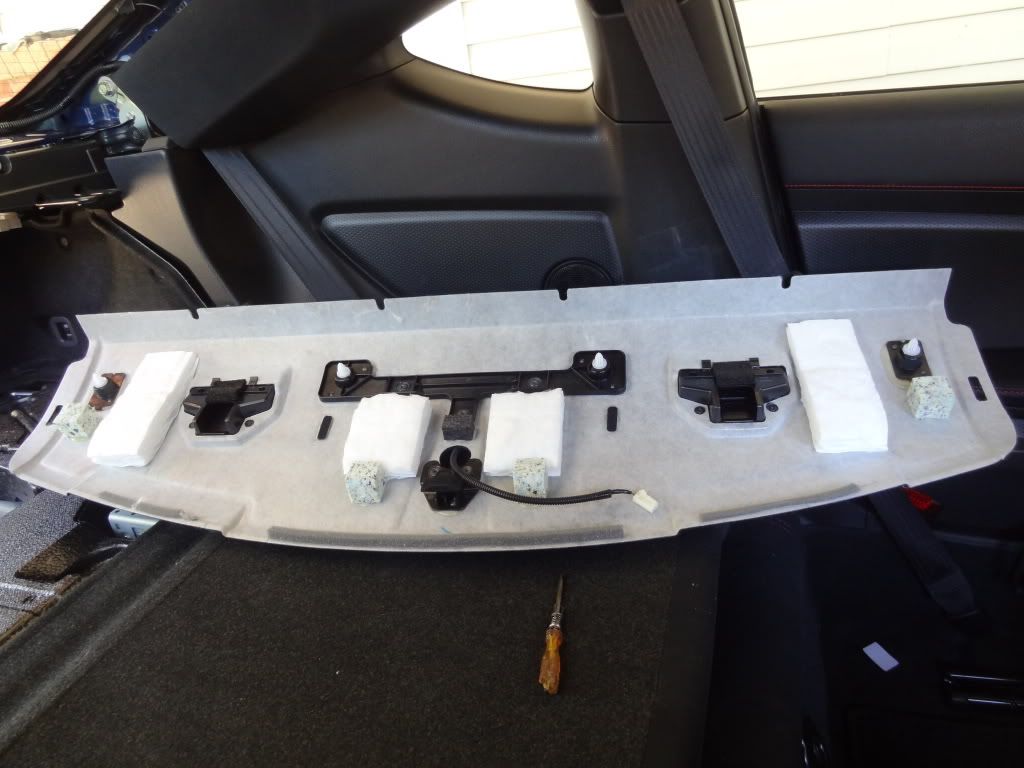
As you can see there are four (4). You can just see them as you look up from inside the trunk area inside the frame:
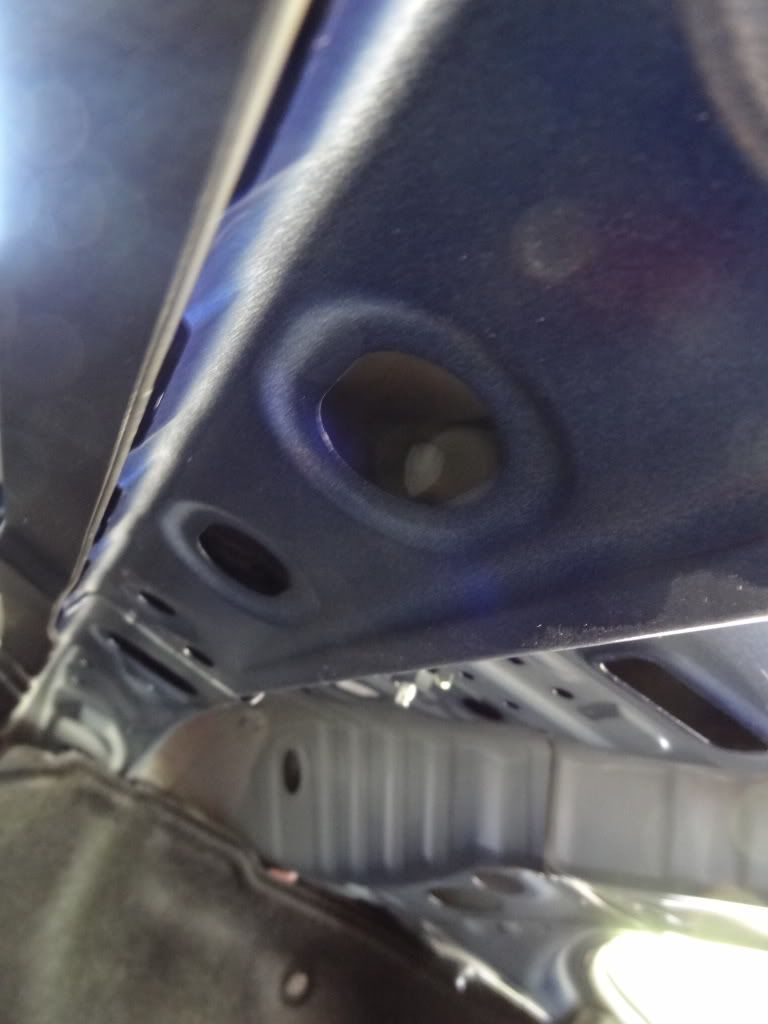
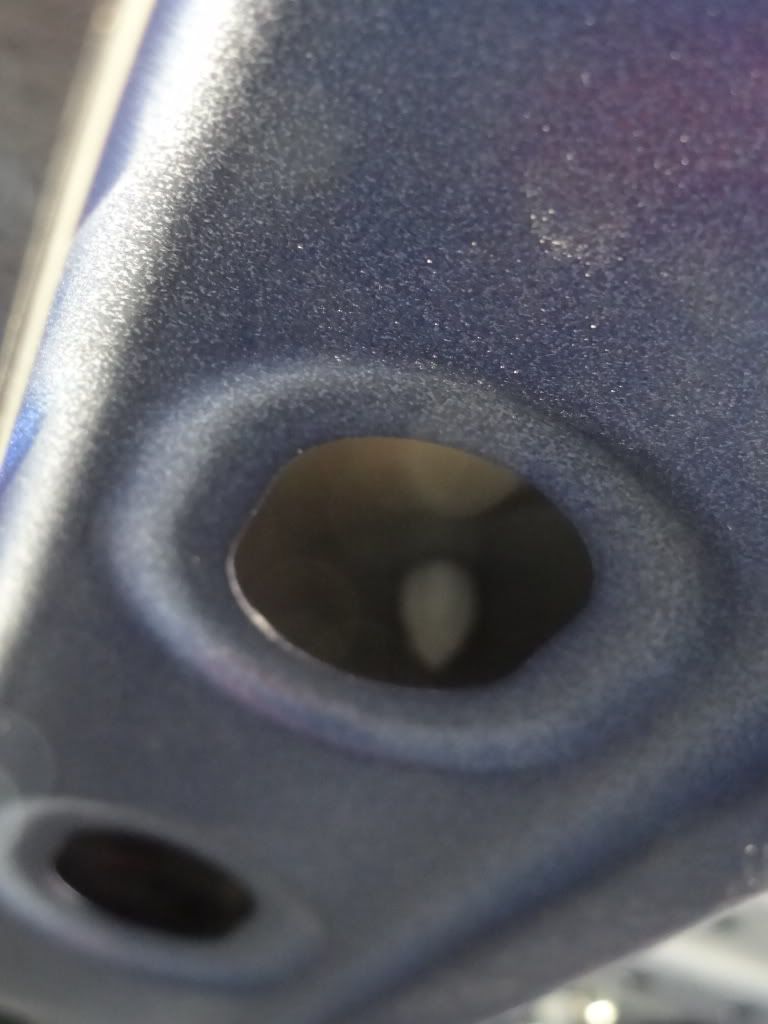
Using the panel clip remover, slide it up and under the panel from the front and feel around until the tool gets a hold of the clip. Pop out the clips, but note that the first one is going to want to snap back into its hole due to the pressure of the panel being stretched into place. Once you have the second clip popped out, the other two clips are much easier to remove. Now just unhook the third brake light wire, push/pull forward on the deck panel, and remove.
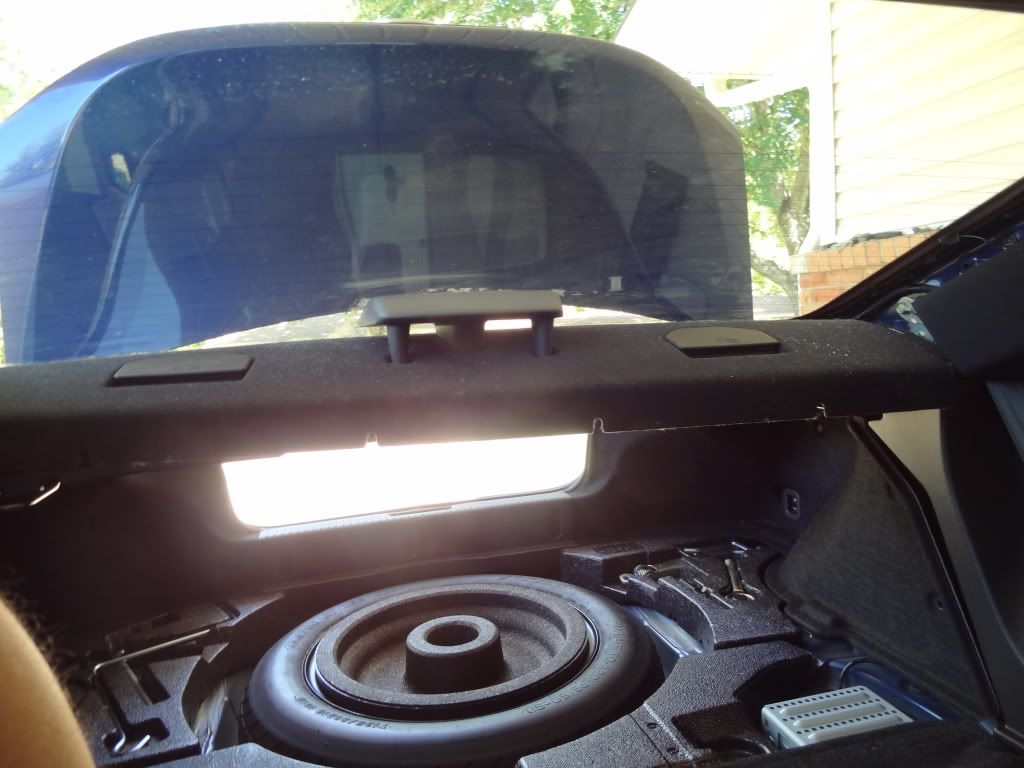
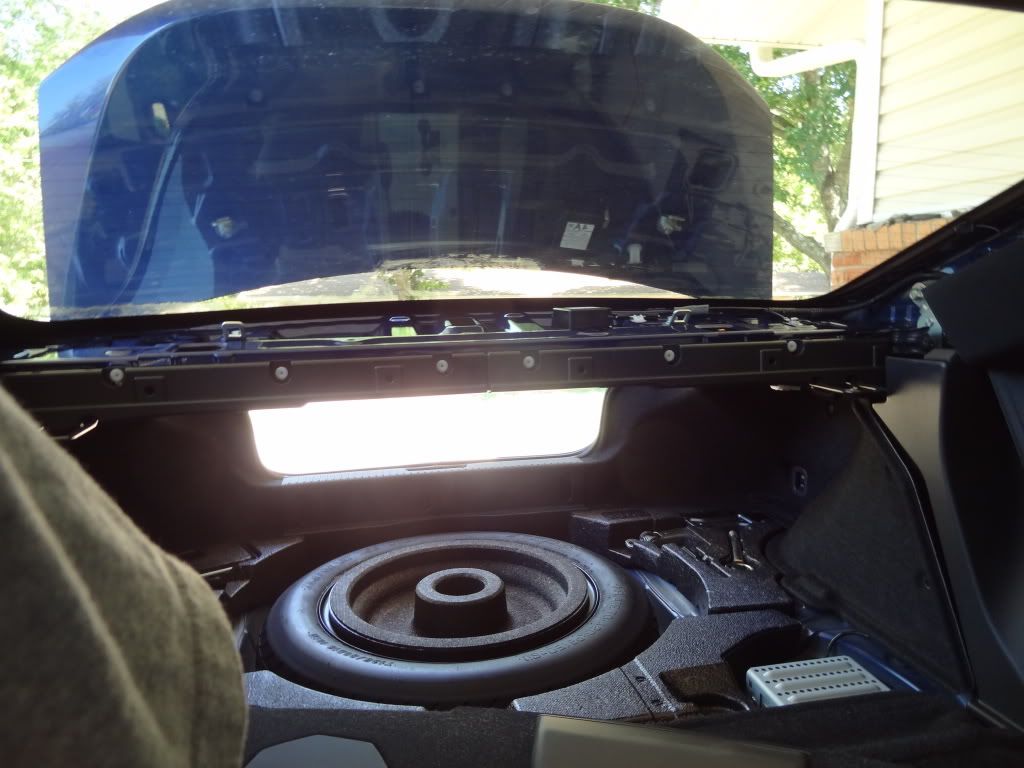
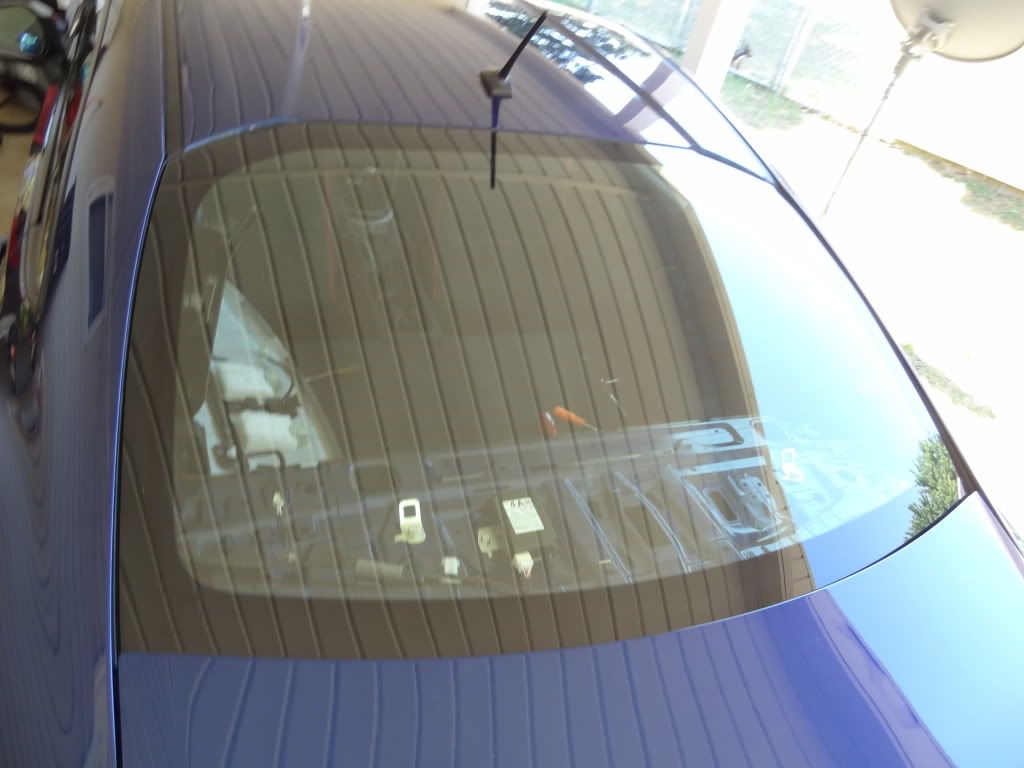
Third brake light is out of the way, you now have full access to the rear window!
__________________
As we've figured out by now, the third brake light is not exactly the easiest thing to work around for window tinting purposes. Removing it is not as simple as one would like, due to the design where the pedestal assembly is molded/glued into the rear deck itself. The rear deck is nothing more that hard-molded felt material, which although lightweight, would make it really easy to bend/crease/ruin if removed improperly. Here is how to get it out without damage:
Here are the tools you'll need:
small flat-tip screwdriver (mainly for the pop-out black clips, but also for prying behind panels to gain a finger hold),
10mm socket (preferably deep well, or maybe on a screwdriver handle),
Interior panel clip remover

If you plan to remove the seat back as well, a 12mm socket is required for the bolts attaching it to the hinges. I didn't need it this time, but my first attempt at this required the removal of the seat back. I'll explain later.
Before you get started, you should unhook your battery. You will be working around the C-Pillar air bag unit, so, you know, safety first and whatnot.
1) Loosen the panel over the C-Pillar which houses the air bag.
This is the point of attack:


Take a small flat-tipped screw driver (or other prying tool) and gain a finger hold on the panel.


As you can see, there are five (5) clips along the bottom edge, and one (1) on the top at the rear. Also there are the two (2) blue straps that keep the panel attached in case of an airbag deployment.

These should not be removed, and unfortunately therefore the panel will be hanging there in the way once you have it loosened up. As you can also see there are two prongs that stick out of the front edge of the panel, which clip under the ceiling fabric panel.

Once you have the top and bottom edges unclipped (by just pulling out towards you by hand) take extra care to wiggle those prongs out as you slowly pull the panel towards the rear of the car. Once it's loose, pull out and down on the blue straps to let the panel hang as loose as possible. You should see this:

2) Remove the smaller, triangle-shaped panel at the bottom of the C-Pillar.
Use the 10mm socket/ratchet to remove the screw attaching the panel to the frame. This screw is VERY TIGHT from the factory, just so you know. I thought I broke something or stripped the head the first time I loosened it.

(Sorry I didn't get a pic of the socket on the screw...only got two hands.)
Next you'll need to remove the two clips holding the trunk liner to the interior panel.

Removing the trunk floor panel and carpet helps, so you don't have to fight with it when maneuvering the felt panel out of the way, like so:

THIS IS WHERE THINGS CAN GET A LITTLE TRICKY!!!
After you remove the clips, you want to pull the interior side panel loose at the top, where the seat belt comes out, because it actually clips in to the panel we are trying to remove. BE VERY GENTLE WITH THIS, and I recommend holding pressure in this area here:

in order to keep the panel from pulling its clips out of the car frame. The clip in this area in particular is not held to the panel itself very strongly, and trying to get it lined back up with the hole in the frame can prove to be a nightmare. I learned the hard way, and whilst trying to line it up with the hole the first time I did this, I ended up knocking the clip out of the panel, and the clip found its way down below the interior sheet metal and into the frame rail of the vehicle. I pulled the panel, seats, and seat back out and couldn't find it. I thought it was lost forever but miraculously after a day of driving, it managed to rattle its way into a place I could reach, and I stuck my arm down inside and was able to fish it out.
Next take your panel clip remover and pop out the clip here:

and then pull straight out at the bottom of the panel to pop out the other clip. With a little twisting and pulling, the panel can now be removed. Here is the back so you know where the clips are I'm talking about:

Now, repeat steps 1 and 2 for the opposite side before continuing.
3) Removing the deck
Now that both sides are loose, all you have left to do is remove the rear deck panel itself. First, remove the black clips from the front of the panel here:

Next, take note of the positions of the white clips on the deck panel itself:

As you can see there are four (4). You can just see them as you look up from inside the trunk area inside the frame:


Using the panel clip remover, slide it up and under the panel from the front and feel around until the tool gets a hold of the clip. Pop out the clips, but note that the first one is going to want to snap back into its hole due to the pressure of the panel being stretched into place. Once you have the second clip popped out, the other two clips are much easier to remove. Now just unhook the third brake light wire, push/pull forward on the deck panel, and remove.


Third brake light is out of the way, you now have full access to the rear window!

Great write up, thanks for all the info and pics
ReplyDelete